Winter can quietly damage garden tools long before spring arrives. Moisture settles on steel, wooden handles absorb dampness, and trapped soil hardens inside moving parts. Learning how to store garden tools during winter protects your investment and reduces unpleasant surprises in March.
The Royal Horticultural Society recommends cleaning, drying, and oiling tools before seasonal storage. Its gardening guidance also links clean equipment with lower disease transmission between plants. The USDA Plant Hardiness Zone Map, updated in 2023, shows why winter conditions vary sharply across regions. A humid coastal shed needs different protection from a dry, freezing garage. Garden Media Group’s annual Garden Trends Report also highlights stronger interest in practical, sustainable gardening. Reusing sound tools supports that goal.
Horticulturist Guy Barter of the RHS has stated, “Clean tools are less likely to spread disease.” That simple warning deserves attention. Before storage, brush away wet soil, rinse carefully, and dry every surface completely. Apply a thin coat of machine oil to metal blades. Hang pruners and spades above a concrete floor. Store wooden handles away from leaking walls and direct heaters. Battery tools need a cool, dry location, while batteries should follow the manufacturer’s charging guidance.
Many gardeners miss one detail: sharp edges can rust faster when stored in damp sheaths. I have also seen tools stored “safely” in boxes, only to emerge with mildew and seized hinges. Good storage is not glamorous. It is consistent, visible, and slightly boring. That may be the point.
Assess and Sort Garden Tools Before Winter Storage
Before winter arrives, I inspect every garden tool in bright daylight. A muddy shovel can hide a cracked socket or a loose handle. I wash soil away, dry the metal completely, and check joints for movement. Rust deserves attention, but light surface rust is not always a reason to discard a tool. I remove loose rust with a stiff brush, then apply a suitable protective coating. Sharp edges need careful handling, even when the tool looks harmless. Gloves and eye protection reduce avoidable injuries.
I sort tools into three groups: ready for storage, needing repair, and beyond safe use. Pruners with dull blades may need sharpening, while cracked handles should be replaced before spring. I tighten loose screws and test moving parts gently. Broken tools should not remain in the storage area, where someone may grab them by mistake. I keep frequently used hand tools together and place long-handled tools upright in a dry, stable corner. Clean labels help, especially when several tools look similar.
I sometimes keep tools because they have sentimental value. That habit can create clutter and hide unsafe equipment. A careful second inspection helps me reconsider those choices. Moisture is the quiet problem. I check for damp soil, wet storage walls, and condensation before putting tools away. Even a clean tool can deteriorate in a poorly ventilated space. I leave a little room between metal surfaces, handles, and the floor.
Clean, Dry, and Repair Tools to Prevent Seasonal Damage
Before winter storage, remove soil from every garden tool. Damp soil holds moisture against steel and encourages rust. I use a stiff brush, then wipe blades with a slightly damp cloth. Never store tools while they are wet. Let them air-dry completely, even inside narrow joints.
Inspect each tool under bright light. Sharpen dull cutting edges carefully, and replace cracked handles before they fail. Tighten loose screws, bolts, and pivot points. A small drop of suitable oil protects hinges and metal surfaces. Wipe away excess oil, because oily dust becomes a gritty paste. I once ignored a loose pruner screw. It separated during spring work and damaged the cutting alignment.
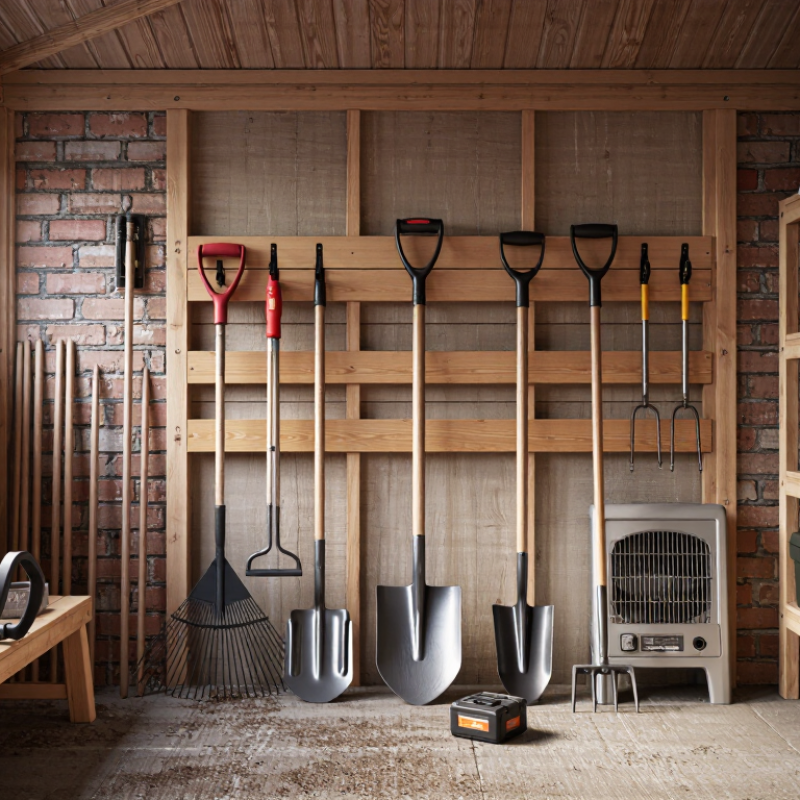
Store tools in a dry, ventilated area away from direct contact with concrete floors. Wall hooks keep shovels and rakes upright, while smaller hand tools fit in a raised container. Avoid sealed plastic bags unless the tools are completely dry. Otherwise, trapped condensation can cause hidden corrosion. Check the storage area after heavy temperature changes. I sometimes forget this step, and that mistake deserves correction. Follow the tool maker’s maintenance guidance for special coatings, batteries, or wooden handles. Wooden parts benefit from a light protective treatment, but they should not feel greasy. Keep sharp edges covered without wrapping them in damp fabric.
Choose a Dry, Safe, and Accessible Storage Location
Before winter arrives, choose a storage location that stays dry, safe, and easy to reach. Moisture can rust metal blades, weaken wooden handles, and damage moving parts. A shed, covered porch cabinet, or ventilated garage corner can work well. Avoid placing tools directly on concrete, where cold moisture often collects. Use a raised shelf or wall hooks instead.
Clean each tool before storing it. Remove soil with a stiff brush, then dry every surface carefully. Wipe metal parts with a light protective oil, especially around joints and cutting edges. Hang shovels, rakes, and hoes above the floor. Keep sharp tools in a secure holder, away from children and walkways. I once stored a pruner in a crowded box, and its blade later scratched another tool. That mistake was avoidable.
Tips: Leave enough space between tools for airflow. Label storage boxes if small parts are easy to lose. Check the area after heavy rain or snow. A dry location is not always dry all winter. Inspect handles for cracks before spring use, even if everything looked fine in autumn. Access matters too; if tools are buried behind boxes, they may be neglected or handled carelessly. Keep a small cleaning cloth nearby, although I often forget this simple step.
Arrange and Check Stored Tools Throughout the Winter
Winter storage is not a “place it and forget it” task.
Cold, damp air can rust metal, loosen handles, and dull cutting edges. Choose a dry corner, then raise tools above the floor on a rack or sturdy boards. Keep shovels and rakes upright, with blades facing away from walkways. Leave space between items. This improves airflow and makes damage easier to spot.
Every few weeks, inspect the storage area after heavy rain or a sudden freeze. Look for condensation, pooled water, cracked wooden handles, and loose fasteners. Wipe moisture from metal surfaces immediately, even if the tool appears clean. A thin coat of suitable protective oil can help prevent surface rust. Do not oil dirty tools. Brush away soil first, then check moving parts for stiffness. For battery-powered equipment, remove the battery and store it separately in a cool, dry place.
I once stored a hand pruner with damp soil in its joint.
By late winter, it opened poorly and needed extra cleaning. That mistake taught me to check hinges, springs, and safety locks regularly. Rotate rarely used tools during inspection instead of stacking them tightly. Replace badly split handles and secure loose heads before spring work begins. A quick repair record helps, although I sometimes forget to update it.
Conclusion
Learning how to store garden tools during winter begins with a careful assessment. Sort tools by condition and purpose, setting aside damaged items for repair or replacement. Clean away soil, sap, and moisture before storage, then dry every surface completely to reduce rust, mold, and deterioration. Sharpen cutting edges when needed, tighten loose parts, and apply suitable protection to metal components. Wooden handles should be kept dry and lightly maintained to prevent cracking, while powered tools should be cleaned, checked, and stored according to their safety requirements.
Choose a storage area that is dry, sheltered, secure, and easy to access, with enough ventilation to limit condensation. Hang frequently used tools when possible and keep heavier equipment stable on shelves or the floor. Avoid placing tools directly on damp surfaces, and organize them so sharp edges are safely covered. During winter, inspect the collection occasionally for rust, moisture, pests, or other damage, allowing you to correct small problems before the tools are needed again.
 Beamer Garden
